Pro-Elite Series Regulator at a Glance

A – CO2 cylinder connection nutB – High pressure / CO2 cylinder pressure gauge (displays the amount of CO2 in your cylinder). Please note, for most of the time pressure will be at level of 700-900PSI as CO2 is in liquid state. When gauge will start to drop, that means liquid gas has evaporated and you have from couple hours to couple of days left to change the cylinder (depending on your bubble rate).C – Low pressure / working pressure gaugeD – Solenoid’s valve main block.E – Bubble counter with integrated check valveF – Gas flow (bubble rate) adjustment, high precision integrated needle valveG – Low power 12VDC solenoid’s electric coilH – Safety relief valve. With easy pull down relief ring. To release gas from the regulator, just pull ring down. This is very useful, when dialling working pressure down. Instead of waiting for gas to escape via needle valve, pull down ring for few seconds and gas will escape from the 2nd stageI – Working pressure adjustment knob
Step 1 | Washer Installation

Place washer between CO2 cylinder outlet and regulator’s stem (inside regulator’s nut)
Step 2 | Tighten the regulator

Tighten the regulator to your CO2 cylinder using a spanner or wrench
Step 3 | Bubble counter installation
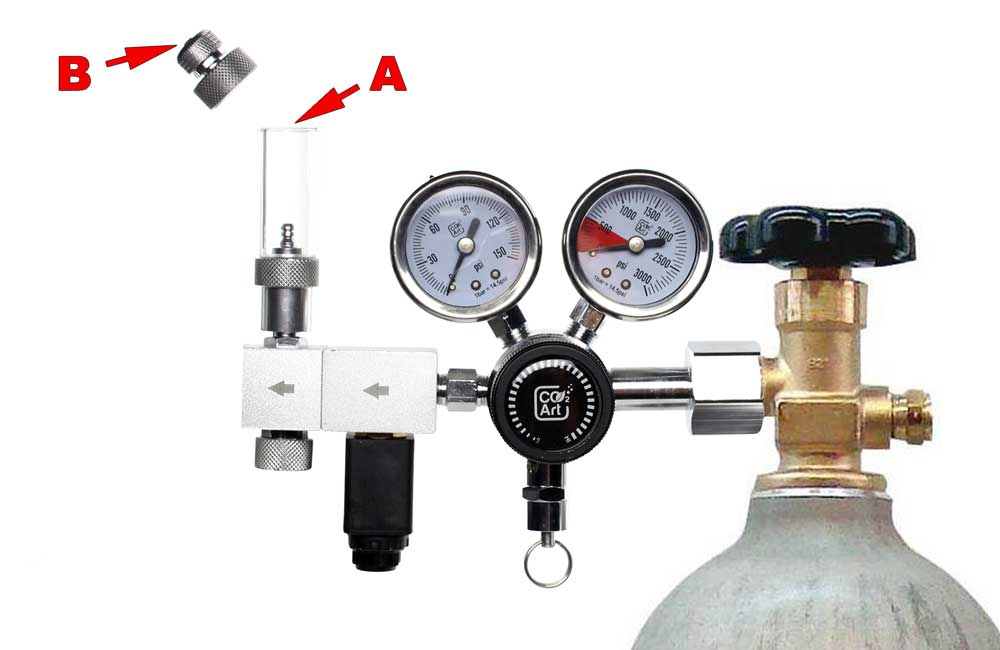
A – Remove top cap and fill bubble counter with water*B – Feed tubing through the collar and install cap back onto the bubble counter(Detailed bubble counter tutorial)*We do not recommend mineral oil as it may contaminate your diffuser.
Step 4 | Pressurising the regulator

A – Open main CO2 cylinder valveB – Adjust working pressure to desire level* by turning front knob clockwise*Working pressure levels guidance :
- 10-20PSI – Reactors
- 20-30PSI – Ceramic and Basic diffusers
- 30-40PSI – High pressure atomizers (inline & bazooka)
- 40-60PSI – Multiple outlets with high pressure atomizers (inline & bazooka)
Step 5 | Fine tuning bubble rate

B – Plug the solenoid into a power outlet socketA – Start turning the needle valve clockwise to achieve the desired bubble rate.Please allow 5-30seconds for pressure to stabilise between adjustments.Monitor your bubble rate for the first two days and fine tune to achieve desire flow.Do not adjust the flow right after solenoid is powered up. Please wait at least 30minutes before further adjustments. After each regulator installation, follow steps from below video to make sure your system is leak-proof.
